 byKelly Winegar
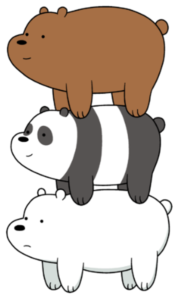
Let’s start a new amigurumi project! First step, decide what to make. I love “We Bear Bears”! You can watch this Cartoon Network show on Netflix. Next, look for a reference photo. This will be a nice and simple beginner’s level project. With that I will source my materials, and then I am going to “cut” the image down into manageable parts. So, let’s get started!
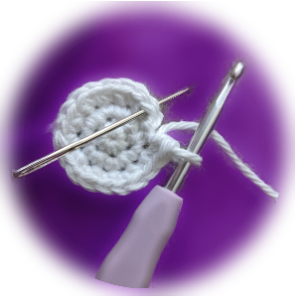
We are going to need yarn, scissors, a crochet hook, a yarn needle, and fluff for stuffing. For amigurumi projects I prefer a cotton yarn and a smaller hook size than what is recommended on the yarn. For this project I want to get fancy, so I am going to be adding little magnets with hot glue so I can stack my bears, but that is optional. If you want real panda fluff, I can’t recommend it, but all these items can be picked up at your local craft store.
Super important, make sure you have a sturdy hook, preferably metal, because this is going to be tight, and you don’t want your hook to break. Don’t be like me and break your favorite hook!
I have picked out the brand “I love this Cotton!”. It is a medium 4 weight, 100% cotton yarn. It calls for a 5.5mm crochet hook, but I am going to use a 3.75mm crochet hook. Think tight thoughts, you don’t want any stuffing peeking through your stitches.
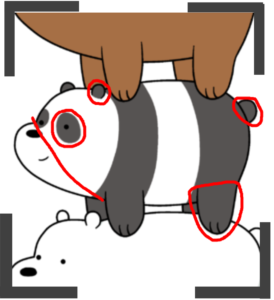
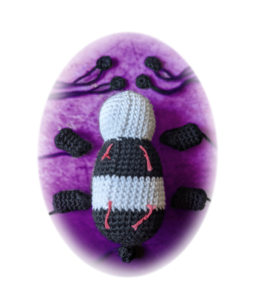
I am focusing on Panda to illustrate his color changes. Let’s break him down! I’ll need one body, four feets, two ears, two eyes, and one tail. I also plan to use four neodymium magnets: two in the front feets, and two in the shoulders. I want to make sure they will hold through the yarn. During assembly, make sure all the magnets are facing the right way.
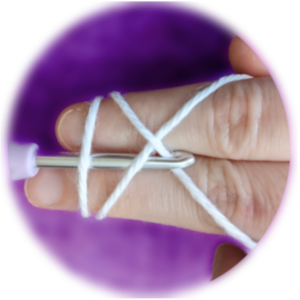
I plan to use the double magic circle to begin each part because that feels the most secure to me.
Let me go over my preferred abbreviations and then give you the pattern. (DMC) double magic circle, (SC) single crochet, (DC) double crochet, (HDC) half double crochet, (SS) slip stitch, (inc) increase, (dec) decrease, (ch) chain. At the end of each round, SS into the first SC of the round, chain 1 and then SC in the same space to begin the new round. Be careful not to SS into the chain 1 because that will throw your count off. This technique will give you nice, separate rows and will allow for Pan-Pan to have clean color changes.
 *Notes: I stuff my fluff very tightly for a stiffer figure. If I were creating a baby toy, I would use a very soft and fluffy yarn and lightly stuff the figure. This allows me to squish Pan-Pan’s little face and it will keep its shape.
Assembly
You may want to mark the areas where you will place body parts as I have. Grab your yarn needle and those long tails, and let’s begin attaching. When I place my eyes, I am going to pull them towards his neckline and anchor them into the black color. This will help his little snoot look more defined. Ears, tail, and feets only need to be secured, but not anchored. As you attach the feets, be sure to rotate the angles around so that they will be pointing down. Finally, we can add embroidery accents like his nose, mouth, and toes. I am using the same yarn as the rest of the project.
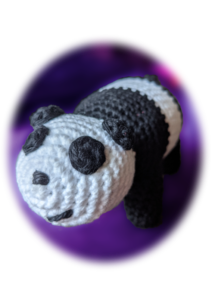
Got Pan-Pan’s cute smirk? It’s selfie time!
Pan-Pan will be so excited to be immortalized on the internet!
Disclaimer: I do not own the characters, but this pattern and tutorial are of my own creation. Enjoy your new friends and I hope this inspires someone to try creating their own patterns!
Reference photo sources:
https://great-characters.fandom.com/wiki/Grizz,_Panda_and_Ice_Bear_(We_Bare_Bears)
https://www.netflix.com/title/80116921
“We Bear Bears” Amigurumi Pattern by Kelly Winegar
Body
Round 1
DMC, SCx6 (Stitch count: 6)
Round 2
inc x 6 (Stitch count: 12)
Round 3
(SC, inc) x 6 (Stitch count: 18)
Round 4
(SC x 2, inc) x 6 (Stitch count: 24)
Round 5
(SC x 3, inc) x 6 (Stitch count: 30)
Round 6 – 11
SC x 36 (Stitch count: 30)
Round 12 – pattern change!
SC, (SC x 4, dec) x 5 (Stitch count: 25)
Round 13
(SC x 3, dec) x 5 (Stitch count: 20)
Round 14 – color change!
(SC x 3, inc) x 5 (Stitch count: 25)
Round 15
(SC x 4, inc) x 5 (Stitch count: 30)
Round 16
(SC x 5, inc) x 5 (Stitch count: 35)
*Notice that switching from the hexagonal (6) pattern to the pentagonal (5) pattern at the neck changes the shape from rounded to a softer angle.
Round 17 – 21
SC x 35 (Stitch count: 35)
*Now is a good time to insert the magnets for the shoulders and begin stuffing Pan-Pan’s cute little face.
Round 21 – 25 – color change!
SC x 35 (Stitch count: 35)
Round 26 – 28 color change!
SC x 35 (Stitch count: 35)
Round 29 – pattern change!
SC x 3, dec, (SC x 4, dec) x 5 (Stitch count: 29)
Round 30
SC x 2, dec, (SC x 3, dec) x 5 (Stitch count: 23)
Round 31
SC, dec, (SC x 2, dec) x 5 (Stitch count: 17)
Round 32
SC x 3, dec, (SC, dec) x 4 (Stitch count: 12)
Round 33
dec x 6, close (Stitch count: 6)
Ears x 2
Round 1
DMC, ch 1, DC x 3, HDC, SS, close the DMC, do not connect the SS to the first DC, leave very long tails
Eyes x 2
Round 1
DMC, SC x 6 (Stitch count: 6), SS closed and leave very long tails
Tail
Round 1
DMC, SC x 6 (Stitch count: 6)
Round 2
inc x 6 (Stitch count: 12)
Round 3
dec x 6 (Stitch count: 6), leave very long tails
Feets x 4
Round 1
DMC, SC x 6 (Stitch count: 6)
Round 2
inc x 6 (Stitch count: 12)
Round 3
SC x 12 (Stitch count: 12), add magnets if desired
Round 4
SC x 4, dec, SC x 4, dec (Stitch count: 10)
Round 5 – 6
SC x 10 (Stitch count: 10)
Round 7
SS in the 2nd SC, SC x 5, SS, ch 1 and turn
Round 8
SS in the second SC, SC x 3, SS x 2, leave a long tail
Rounds 7 and 8 will give a nice angle to attach to the body so that the feets will end up pointing downwards and be more parallel.